Volley 源码分析
Volley概述
Volley是Google 2013年I/O大会推出的针对Android的HTTP网络请求框架,让网络请求更简单,更快。
今天我们来点干货 分析下Volley源码 不介绍Volley基本用法 概念等等
因为 张鸿洋 郭霖 等大神
博客都写的很清晰了 非常通俗易懂 赞!
IDE AndroidStudio 直接在AS上分析就行
开始分析
1.缓存文件与网络
我们一个 mRequestQueue 是通过 newRequestQueue拿到的 所以我们直接点进去 
他里面调用的是这个方法 直接点 
点击进去 我们看到了这样一个方法
 private static final String DEFAULT_CACHE_DIR = "volley";

    /**
     * Creates a default instance of the worker pool and calls {@link RequestQueue#start()} on it.
     *
     * @param context A {@link Context} to use for creating the cache dir.
     * @param stack An {@link HttpStack} to use for the network, or null for default.
     * @return A started {@link RequestQueue} instance.
     */
    public static RequestQueue newRequestQueue(Context context, HttpStack stack) {
        File cacheDir = new File(context.getCacheDir(), DEFAULT_CACHE_DIR);

        String userAgent = "volley/0";
        try {
            String packageName = context.getPackageName();
            PackageInfo info = context.getPackageManager().getPackageInfo(packageName, 0);
            userAgent = packageName + "/" + info.versionCode;
        } catch (NameNotFoundException e) {
        }

        if (stack == null) {
            if (Build.VERSION.SDK_INT >= 9) {
                stack = new HurlStack();
            } else {
                // Prior to Gingerbread, HttpUrlConnection was unreliable.
                // See: http://android-developers.blogspot.com/2011/09/androids-http-clients.html
                stack = new HttpClientStack(AndroidHttpClient.newInstance(userAgent));
            }
        }

        Network network = new BasicNetwork(stack);

        RequestQueue queue = new RequestQueue(new DiskBasedCache(cacheDir), network);
        queue.start();

        return queue;
    }
不要慌 我们一行一行分析 看看这个方法到底做了些什么 从第一行开始
Volley 默认的缓存地址是从这里设置的
File cacheDir = new File(context.getCacheDir(), DEFAULT_CACHE_DIR);首先我们先来看 这个局部变量的名字 cacheDir 缓存的的文件夹
getCacheDir 指向于 data/data/包名/cache/ 加DEFAULT_CACHE_DIR ==volley
这里就得到了Volley的缓存地址为 data/data/包名/cache/volley
Volley官方文档说明 Volley 易于定制 扩展性强 所以说我们可以随便改源码
我们拿到了缓存文件夹 在来看他用在哪里了
RequestQueue queue = new RequestQueue(new DiskBasedCache(cacheDir), network);通过代码我们看到他传给了 DiskBasedCache
每一个响应有一个缓存文件 而这些都是由DiskBasedCache 来提供支持
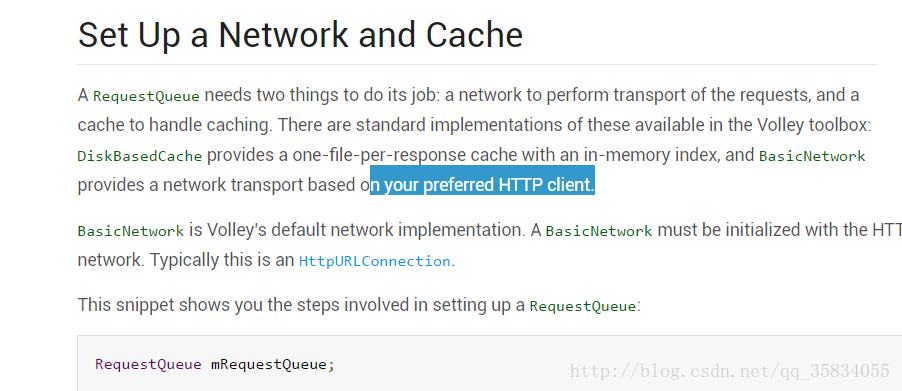
官方文档说明 你的RequestQueue 需要两个东西去维持他的工作 缓存与网络
现在我们拿到了缓存
网络
Network network = new BasicNetwork(stack);由BasicNetwork 来提供网络的传输
BasicNetwork 可以根据你喜欢的http client 来选择
官方说明
   if (stack == null) {
            if (Build.VERSION.SDK_INT >= 9) {
                stack = new HurlStack();
            } else {
                // Prior to Gingerbread, HttpUrlConnection was unreliable.
                // See: http://android-developers.blogspot.com/2011/09/androids-http-clients.html
                stack = new HttpClientStack(AndroidHttpClient.newInstance(userAgent));
            }
        }

        Network network = new BasicNetwork(stack);
接着继续看stack Volley内部做了个判断 如果你的当前SDK版本大于9(2.3.3)则使用 HurlStack HttpURLConnection
如果小于2.3 则使用 HttpClientStack
源码中有个链接是 谷歌开发人员的一个博客 介绍了利弊 
大概意思就是说在2.3以前用HttpClient最好 因为BUG少
2.3之后的HttpURLConnection 是最好的选择 其简单的API和代码量很少使其非常适合Android 透明的压缩和缓存缓存减少网络使用,提高速度并节省电池
HttpClient都被google废弃了 在6.0 SDK中直接拿掉了
接着又回到上头 我们说过可以自定义Stack 选择自己喜欢的http 但其实这个参数 一般都为空 …
倒序回到调用 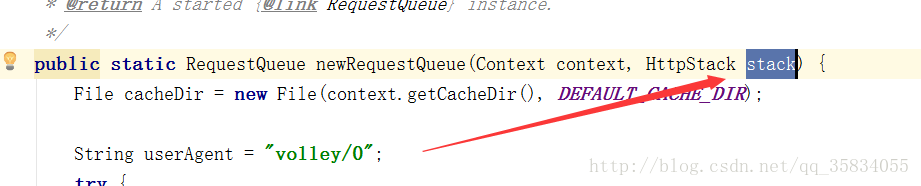
Stack 默认为null 
我们传的是单参数的方法 传到源码就是一个上下文 所以说还是会走系统默认 通过SDK自行选择
mRequestQueue = Volley.newRequestQueue(this);
我们的volley 是通过一个 queue.start()方法开启的 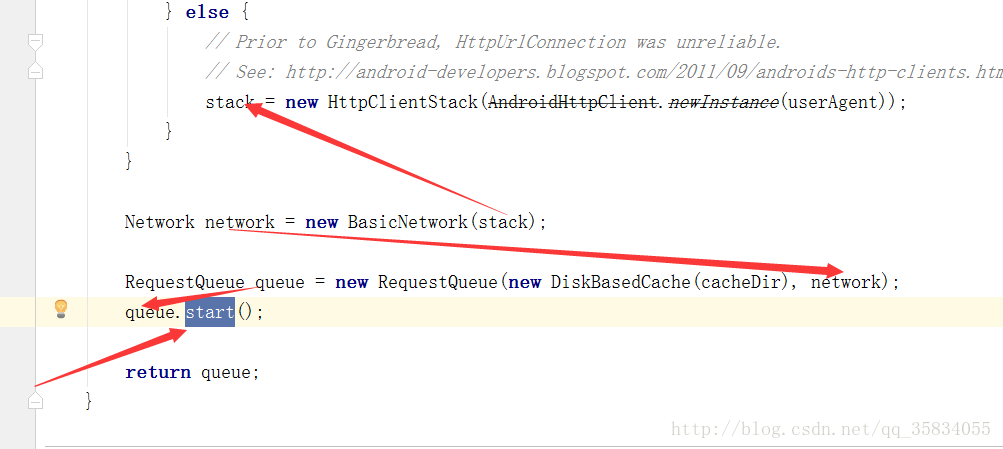
开启
点进start 我们看到了这些代码
/**
     * Starts the dispatchers in this queue.
     */
    public void start() {
        stop();  // Make sure any currently running dispatchers are stopped.
        // Create the cache dispatcher and start it.
        mCacheDispatcher = new CacheDispatcher(mCacheQueue, mNetworkQueue, mCache, mDelivery);
        mCacheDispatcher.start();

        // Create network dispatchers (and corresponding threads) up to the pool size.
        for (int i = 0; i < mDispatchers.length; i++) {
            NetworkDispatcher networkDispatcher = new NetworkDispatcher(mNetworkQueue, mNetwork,
                    mCache, mDelivery);
            mDispatchers[i] = networkDispatcher;
            networkDispatcher.start();
        }
    }
我们看到了 在start前他先进行了stop 其实这是一种很好的代码实现方式
避免你这个应用被start两次
接着创建缓存调度程序并启动它。
为什么这么说 new CacheDispatcher 缓存线程 我们点进去看下
 mCacheDispatcher = new CacheDispatcher(mCacheQueue, mNetworkQueue, mCache, mDelivery);
        mCacheDispatcher.start();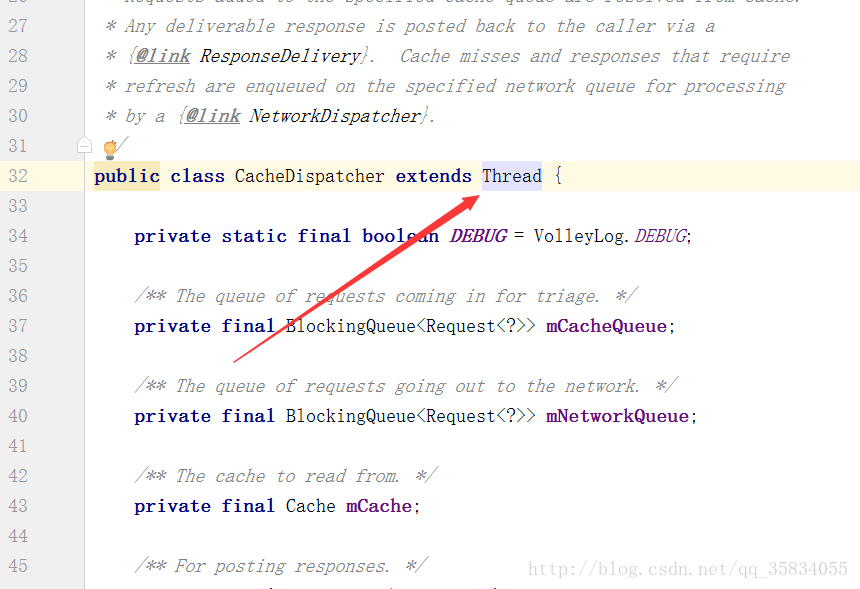
接着下面的代码 创建了一池子的网络线程
// Create network dispatchers (and corresponding threads) up to the pool size.
for (int i = 0; i < mDispatchers.length; i++) {
NetworkDispatcher networkDispatcher = new NetworkDispatcher(mNetworkQueue, mNetwork,
mCache, mDelivery);
mDispatchers[i] = networkDispatcher;
networkDispatcher.start();
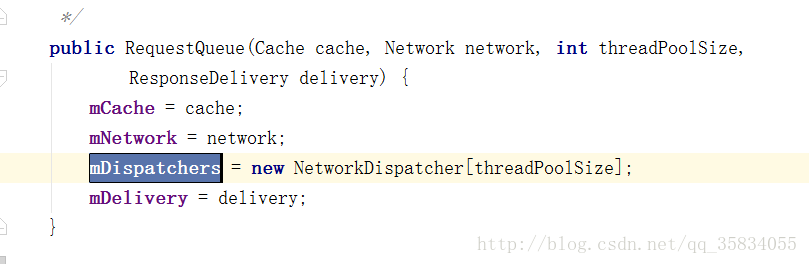
}我们来找一找 for循环的length值为多少吧 点击mDispatchers
Shift+F 全局查找 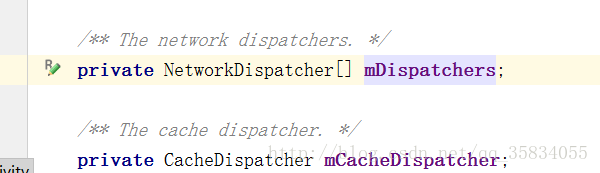
来到了这里 threadPoolSize 是通过构造方法传过来的
Alt+F7 查看RequestQueue在哪里被调用了
到了这 在快捷键 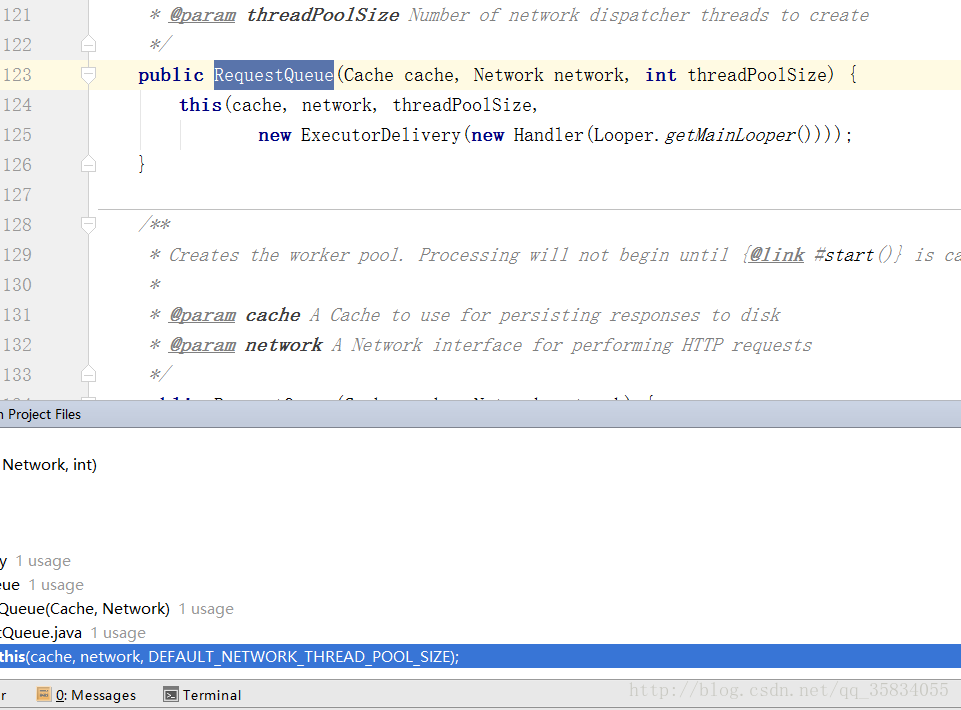
找到了调用地址 双击点进去 
上面可能有点花眼 重点记住快捷键的使用
也就是说当queue.start() 开启的时候我们 创建了一个缓存线程 并创建了
4个网络线程 并且分别把它们给开启
12.30了 睡觉了 写博客真费时间…. 好在是周末
我们接着回到缓存线程 CacheDispatcher继承于 Thread 肯定会执行run方法 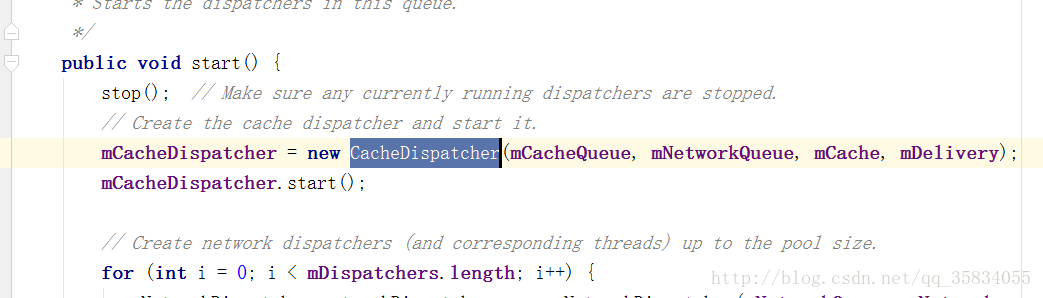
我们来看看 缓存线程的run方法都干了些什么
 @Override
    public void run() {
        if (DEBUG) VolleyLog.v("start new dispatcher");
        Process.setThreadPriority(Process.THREAD_PRIORITY_BACKGROUND);

        // Make a blocking call to initialize the cache.
        mCache.initialize();

        while (true) {
            try {
                // Get a request from the cache triage queue, blocking until
                // at least one is available.
                final Request<?> request = mCacheQueue.take();
                request.addMarker("cache-queue-take");

                // If the request has been canceled, don't bother dispatching it.
                if (request.isCanceled()) {
                    request.finish("cache-discard-canceled");
                    continue;
                }

                // Attempt to retrieve this item from cache.
                Cache.Entry entry = mCache.get(request.getCacheKey());
                if (entry == null) {
                    request.addMarker("cache-miss");
                    // Cache miss; send off to the network dispatcher.
                    mNetworkQueue.put(request);
                    continue;
                }

                // If it is completely expired, just send it to the network.
                if (entry.isExpired()) {
                    request.addMarker("cache-hit-expired");
                    request.setCacheEntry(entry);
                    mNetworkQueue.put(request);
                    continue;
                }

                // We have a cache hit; parse its data for delivery back to the request.
                request.addMarker("cache-hit");
                Response<?> response = request.parseNetworkResponse(
                        new NetworkResponse(entry.data, entry.responseHeaders));
                request.addMarker("cache-hit-parsed");

                if (!entry.refreshNeeded()) {
                    // Completely unexpired cache hit. Just deliver the response.
                    mDelivery.postResponse(request, response);
                } else {
                    // Soft-expired cache hit. We can deliver the cached response,
                    // but we need to also send the request to the network for
                    // refreshing.
                    request.addMarker("cache-hit-refresh-needed");
                    request.setCacheEntry(entry);

                    // Mark the response as intermediate.
                    response.intermediate = true;

                    // Post the intermediate response back to the user and have
                    // the delivery then forward the request along to the network.
                    mDelivery.postResponse(request, response, new Runnable() {
                        @Override
                        public void run() {
                            try {
                                mNetworkQueue.put(request);
                            } catch (InterruptedException e) {
                                // Not much we can do about this.
                            }
                        }
                    });
                }

            } catch (InterruptedException e) {
                // We may have been interrupted because it was time to quit.
                if (mQuit) {
                    return;
                }
                continue;
            }
        }
    }
我们看到 他维护了一个while true 的死循环
 // Get a request from the cache triage queue, blocking until
                // at least one is available.
                final Request<?> request = mCacheQueue.take();
                request.addMarker("cache-queue-take");
从mCacheQueue 中拿到request
他这个死循环不是一直运行的而是一个阻塞式运行take()
如果有我就取 没有就等着
  // If the request has been canceled, don't bother dispatching it.
                if (request.isCanceled()) {
                    request.finish("cache-discard-canceled");
                    continue;
                }
他拿到了request 做了一个判断你的request是不是被人给取消掉了 如果取消掉了就不做任何操作 如果没有接着往下走
 // Attempt to retrieve this item from cache.
      Cache.Entry entry = mCache.get(request.getCacheKey());
                if (entry == null) {
                    request.addMarker("cache-miss");
                    // Cache miss; send off to the network dispatcher.
                    mNetworkQueue.put(request);
                    continue;
                }
通过 request.getCacheKey() 尝试从缓存的集合中拿到他缓存的数据
getCacheKey getUrl 通过这个url服务器地址为一个key 进行判断
/**
     * Returns the cache key for this request.  By default, this is the URL.
     */
    public String getCacheKey() {
        return getUrl();
    }
如果没有request缓存数据 就把这个request添加到网络队列里
mNetworkQueue.put(request);如果有缓存数据则不会走之前的if判断 就走到了这里
  // If it is completely expired, just send it to the network.
                if (entry.isExpired()) {
                    request.addMarker("cache-hit-expired");
                    request.setCacheEntry(entry);
                    mNetworkQueue.put(request);
                    continue;
                }
entry.isExpired() 判断你缓存数据是否过期了 如果过期
接这把你添加到网络对列里 mNetworkQueue.put(request); 等待网络请求
如果有缓存并且没有过期就接着往下走
   Response<?> response = request.parseNetworkResponse(
                        new NetworkResponse(entry.data, entry.responseHeaders));
解析与响应 他把你缓存的数据存进去 并最终拿到了response 想要的数据
Volley可以把原生的响应数据 entry.data 解析成你想要的数据 也就是io流带过来的二进制
接着继续走到了这句
mDelivery.postResponse(request, response);把request响应的数据分发到主线程 这就是缓存大概流程
接着我们看网络线程的run方法 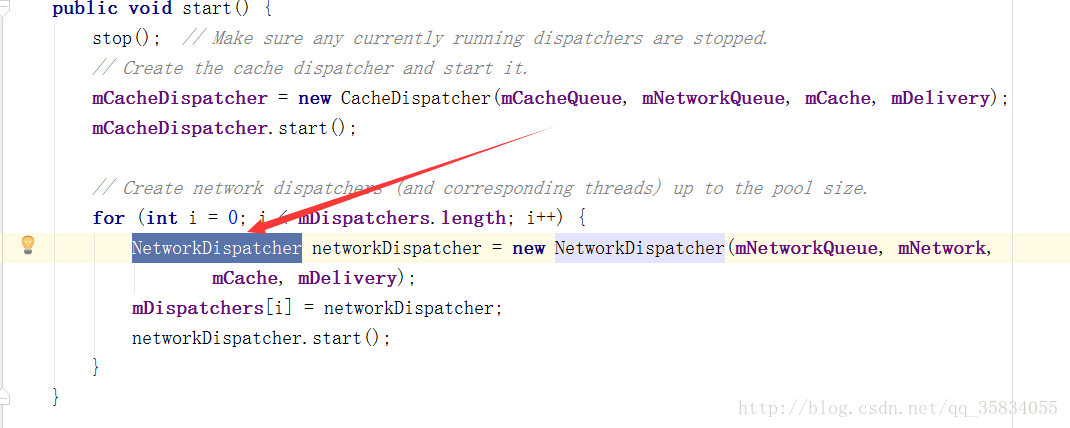
网络线程的run方法
 @Override
    public void run() {
        Process.setThreadPriority(Process.THREAD_PRIORITY_BACKGROUND);
        while (true) {
            long startTimeMs = SystemClock.elapsedRealtime();
            Request<?> request;
            try {
                // Take a request from the queue.
                request = mQueue.take();
            } catch (InterruptedException e) {
                // We may have been interrupted because it was time to quit.
                if (mQuit) {
                    return;
                }
                continue;
            }

            try {
                request.addMarker("network-queue-take");

                // If the request was cancelled already, do not perform the
                // network request.
                if (request.isCanceled()) {
                    request.finish("network-discard-cancelled");
                    continue;
                }

                addTrafficStatsTag(request);

                // Perform the network request.
                NetworkResponse networkResponse = mNetwork.performRequest(request);
                request.addMarker("network-http-complete");

                // If the server returned 304 AND we delivered a response already,
                // we're done -- don't deliver a second identical response.
                if (networkResponse.notModified && request.hasHadResponseDelivered()) {
                    request.finish("not-modified");
                    continue;
                }

                // Parse the response here on the worker thread.
                Response<?> response = request.parseNetworkResponse(networkResponse);
                request.addMarker("network-parse-complete");

                // Write to cache if applicable.
                // TODO: Only update cache metadata instead of entire record for 304s.
                if (request.shouldCache() && response.cacheEntry != null) {
                    mCache.put(request.getCacheKey(), response.cacheEntry);
                    request.addMarker("network-cache-written");
                }

                // Post the response back.
                request.markDelivered();
                mDelivery.postResponse(request, response);
            } catch (VolleyError volleyError) {
                volleyError.setNetworkTimeMs(SystemClock.elapsedRealtime() - startTimeMs);
                parseAndDeliverNetworkError(request, volleyError);
            } catch (Exception e) {
                VolleyLog.e(e, "Unhandled exception %s", e.toString());
                VolleyError volleyError = new VolleyError(e);
                volleyError.setNetworkTimeMs(SystemClock.elapsedRealtime() - startTimeMs);
                mDelivery.postError(request, volleyError);
            }
        }
    }
首先看到的依旧是一个 阻塞 死循环 依旧是从一个mQueue取request
 // Take a request from the queue.
                request = mQueue.take();
也做了一个判断 取消了不做任何操作
 if (request.isCanceled()) {
                    request.finish("network-discard-cancelled");
                    continue;
                }
没取消就走到了这里 去执行一个网络请求 拿到了networkResponse
  // Perform the network request.
                NetworkResponse networkResponse = mNetwork.performRequest(request);
                request.addMarker("network-http-complete");
如果没有304异常就把networkResponse 解析成了一个response
  // Parse the response here on the worker thread.
                Response<?> response = request.parseNetworkResponse(networkResponse);
                request.addMarker("network-parse-complete");
接着走到了一个判断
 // Write to cache if applicable.
                // TODO: Only update cache metadata instead of entire record for 304s.
                if (request.shouldCache() && response.cacheEntry != null) {
                    mCache.put(request.getCacheKey(), response.cacheEntry);
                    request.addMarker("network-cache-written");
                }
如果我的请求是被需要缓存的request.shouldCache() 那就写缓存
mCache.put(request.getCacheKey(), response.cacheEntry);
写完了缓存就走到了这里 分发到主线程
mDelivery.postResponse(request, response);我们来看看postResponse怎么发送到主线程的把 
我们来到了这里 正常的线程池execute 里面应该是开线程 处理事件 Volley重写了这个方法 直接分发到主线程
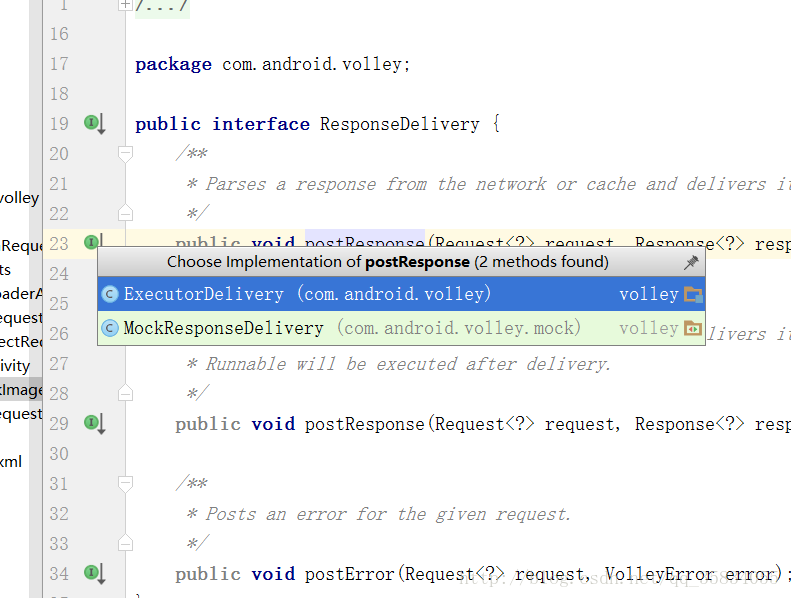
因此,我们的Response响应最终会在主线程被调用方接收并进行处理。
总结图片

Volley只是个框架从源码就能看到 最底层的操作还是由 HttpClient HttpURLConnection 来实现的 其实选择网络可以改成okhttp 可自行改造 自由度非常高
最后我感觉我写的挺清晰了 有什么不对的地方 希望留言 我会进行修改 详细到写的我快吐血了….