首先,我们的CentOS版本信息如下:

开始我们的编译。
第一步:
将php安装包安装到/usr/src目录下。
cd /usr/src && wget http://cn2.php.net/distributions/php-7.2.3.tar.gz

第二步:
加压这个压缩包
tar -xzxvf php-7.2.3.tar.gz

第三步:
进入压缩后的文件目录。安装如下文件,如果已经安装也没问题,系统会提示已经安装,nothing to do。
cd php-7.2.3/
yum install gcc
yum install libxml2-devel
yum install libxml2-devel


第四步:
执行以下命令(编译的配置参数)
'./configure' '--prefix=/usr/local/php' '--with-pdo-pgsql' '--with-zlib-dir' '--with-freetype-dir' '--enable-mbstring' '--with-libxml-dir=/usr' '--enable-soap' '--enable-calendar' '--with-curl' '--with-mcrypt' '--with-gd' '--with-pgsql' '--disable-rpath' '--enable-inline-optimization' '--with-bz2' '--with-zlib' '--enable-sockets' '--enable-sysvsem' '--enable-sysvshm' '--enable-pcntl' '--enable-mbregex' '--enable-exif' '--enable-bcmath' '--with-mhash' '--enable-zip' '--with-pcre-regex' '--with-pdo-mysql' '--with-mysqli' '--with-jpeg-dir=/usr' '--with-png-dir=/usr' '--enable-gd-native-ttf' '--with-openssl' '--with-fpm-user=www-data' '--with-fpm-group=www-data' '--with-libdir=/lib/x86_64-linux-gnu/' '--enable-ftp' '--with-gettext' '--with-xmlrpc' '--with-xsl' '--enable-opcache' '--enable-fpm' '--with-iconv' '--with-xpm-dir=/usr'

最后一行会出现错误提示:configure: error: Cannot find OpenSSL's <evp.h>
未发现openssl,我们安装就好。
yum install openssl openssl-devel
出现Complete!则表示安装完成
继续以上命令出现错误提示: configure: error: Please reinstall the BZip2 distribution
安装即可
yum install bzip2-devel.x86_64 -y
仔细看还有错误:configure: WARNING: This bison version is not supported for regeneration of the Zend/PHP parsers (found: none, min: 204, excluded: ).
安装即可
wget http://ftp.gnu.org/gnu/bison/bison-2.4.1.tar.gz
tar -zxvf bison-2.4.1.tar.gz
cd bison-2.4.1/
./configure
提示错误:configure: error: GNU M4 1.4 is required
未安装m4
再重新编译上面的make clean && make install
安装完成后切入php目录
继续配置checking发现错误:configure: WARNING: unrecognized options: --with-mcrypt, --enable-gd-native-ttf
这个是由于php7.2是 17年11月份发行的,在php7.1时,
官方就开始建议用openssl_*系列函数代替Mcrypt_*系列的函数。
所以我们删除这两项即可。
然后继续发现错误:configure: WARNING: You will need re2c 0.13.4 or later if you want to regenerate PHP parsers.
解决:
wget https://sourceforge.net/projects/re2c/files/0.16/re2c-0.16.tar.gz
tar zxf re2c-0.16.tar.gz && cd re2c-0.16
./configure
make && make install
如果出现错误:configure: error: C++ compiler cannot create executables
就是gcc扩展没装全。
yum install gcc gcc-c++ gcc-g77
至此,再测试,发现已无报错。
当你进行 make时候发现:No targets specified and no makefile found. Stop.
则需要进行一下方案解决:
#拿到安装包
wget http://ftp.gnu.org/pub/gnu/ncurses/ncurses-5.6.tar.gz
#解压
tar zxvf ncurses-5.6.tar.gz
#指向php的路径
./configure -prefix=/usr/src/php-7.2.3
#开始make
make && make install
此时,我们再去/usr/src/php-7.2.3目录下make && make install。
这时候 我们输入php -v可以看到php的版本。

但是,我们一般还需要做一个配置。让php成为一个服务。并且开机自启。
但是却发现php-fpm不知道咋哪里。 那我们就应该安装php-fpm.
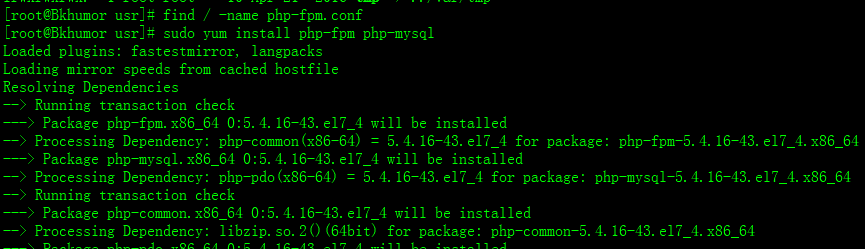
#找找php-fpm
find / -name php-fpm.conf
#没找到就安装
yum install php-fpm php-mysql
做如下的配置
mkdir -p /usr/local/php/etc/
touch /usr/local/php/etc/php-fpm.conf
cp /etc/php-fpm.conf /usr/local/php/etc/php-fpm.conf
同样道理
mkdir -p /usr/local/php/etc/php-fpm.d/
touch /usr/local/php/etc/php-fpm.d/www.conf
cp /etc/php-fpm.d/www.conf /usr/local/php/etc/php-fpm.d/www.conf
继续
mkdir -p /etc/init.d
touch /etc/init.d/php-fpm
cp /usr/src/php-7.2.3/sapi/fpm/init.d.php-fpm.in /etc/init.d/php-fpm
启动服务并查看
 service php-fpm start
 ps aux | grep php-fpm
此时我们的php编译就大功告成。
如下:

----------------- 如果这篇文章帮到了你,或者遇到什么问题,可以在以下留言交流。